This sweet and savory DIY dessert charcuterie board is pure indulgence made simple — a colorful spread of juicy berries, rich chocolate, and golden pretzels that hits every craving in one bite. With no baking required and endless mix-and-match options, it’s the easiest way to impress guests or treat yourself to something beautiful and delicious.

There’s something magical about building a board that tells a story — one that blends the sweetness of fresh fruit with the salty crunch of pretzels and the melt-in-your-mouth satisfaction of dark chocolate. I still remember the first time I made one for a cozy movie night with friends. Everyone gathered around the table, eyes widening at the sight of strawberries glistening beside velvety chocolate squares, raspberries nestled next to caramel pretzels, and a tiny bowl of chocolate dip crowned with berries. It wasn’t just dessert — it was a moment of joy we could all share.
Creating a sweet and savory dessert charcuterie board is all about contrast: rich and fresh, creamy and crisp, sweet and salty. It’s perfect for birthdays, date nights, or casual weekends when you want something that feels special but takes minutes to put together. I love pairing this board with warm, comforting dishes like these brown sugar glazed sweet potatoes or a cozy classic turkey stuffing before the grand finale — dessert that feels like art. For festive gatherings, I often serve it alongside my 5-star creamy corn casserole for a complete comfort-food experience.
At home, I keep a few favorite tools handy that make prep easy: the Lightyear Silicone Basting & Pastry Brush Set (buy here) — perfect for glazing fruit or brushing melted chocolate — and my trusty Escali Primo Digital Food Scale (get it here) to portion ingredients accurately. These small touches make all the difference when turning simple snacks into a gourmet-style spread.
Explore the Steps
How to Build the Perfect Sweet and Savory Dessert Charcuterie Board
Building a dessert charcuterie board is equal parts creativity and balance. Start with your base — a large round wooden board or slate platter — and think of it like a blank canvas. Begin by anchoring the layout with small bowls: one for melted chocolate or hazelnut spread, one for nuts or yogurt-covered pretzels, and one for fresh raspberries. This gives structure before you fill in the textures and colors.
Step 1: Choose your sweets
Think layers of flavor. Use dark chocolate chunks, chocolate bark, or even mini brownies for richness. Strawberries, blackberries, and raspberries add freshness, while candies or chocolate-dipped cookies bring color and crunch. You can draw inspiration from holiday boards like our 10 stunning candy cane charcuterie board ideas for creative combinations.
Step 2: Add your savory balance
Savory items keep the board from feeling overly sweet. Pretzel twists, salted nuts, and even cheese cubes are excellent options. If you’re serving during the holidays, a mini cheese section inspired by this classic DIY meat and cheese charcuterie board pairs beautifully with chocolate-covered strawberries.
Step 3: Fill the gaps with color and texture
No empty spaces! Use fresh berries, small cookies, or dried fruit to fill every corner. That’s what makes the board look abundant and inviting. Sprinkle a few sea salt flakes or drizzle melted chocolate with the NileHome Stainless Steel Whisk Set (available here) for a glossy finish.
Step 4: Serve and enjoy
For best presentation, serve immediately or refrigerate for up to one hour before guests arrive. Pair it with a fun drink like a Beetlejuice cocktail recipe or keep it family-friendly with a 5-minute kids-friendly mini snack board.
The key is not perfection but playfulness — every board should feel different depending on the season and your mood. Sophie’s tip: Always include at least one “surprise bite,” something your guests don’t expect, like dark chocolate with chili flakes or fresh basil-strawberry skewers. It’s those little details that make your board unforgettable.

Choosing the Right Ingredients & Flavors
Creating a Sweet and Savory DIY Dessert Charcuterie Board is an act of balance — every ingredient has its own purpose. You want that perfect play between indulgence and freshness, sweet and salty, soft and crisp. It’s not just about placing food beautifully; it’s about creating an experience where each bite surprises and satisfies.
When I build my boards, I start by setting a theme. Maybe it’s “cozy chocolate night” with deep, rich tones of cocoa and berries like in the photo above, or a playful “pink celebration” filled with candy, strawberries, and pastel cookies. The theme helps guide every choice — from the color palette to the final drizzle of chocolate.
Fruits That Steal the Show
Always begin with fruit — it’s the heart of any dessert board. Choose seasonal, vibrant produce that feels indulgent but natural. Strawberries, raspberries, and blackberries add juiciness and color contrast, while dried apricots or figs give a chewy sweetness that pairs perfectly with chocolate and cheese. For more creative pairings, check out these fall harvest charcuterie board ideas — they show how seasonal fruits can completely transform the flavor profile of your board.
Here’s my secret: brush berries and sliced fruit lightly with honey using the Lightyear Silicone Basting & Pastry Brush Set (get it here). This adds shine and keeps them from drying out during your event.
Chocolate: The Anchor of Sweetness
Chocolate is what gives your board its soul. Mix dark, milk, and white varieties to build contrast and depth. I love cutting large bars into rustic chunks and mixing them with bite-sized truffles or bark pieces. A few shards of chocolate-covered pretzels bring that irresistible salty note.
For extra inspiration, browse our 10 irresistible brownie recipes archives — many of those recipes work perfectly as bite-sized additions for your board. You can even make small brownie cubes or drizzle your favorite chocolate ganache for a stunning centerpiece.
Savory Elements That Make the Magic
Never underestimate the power of salt. It amplifies sweetness and makes each bite more satisfying. Add a handful of mini pretzels, roasted almonds, or cashews for that perfect crunch. If you enjoy savory touches, small cheese wedges like brie or aged cheddar can elevate the mix without overpowering it.
For holiday spreads, I often draw inspiration from the Thanksgiving meat and cheese board ideas — the way those boards use color and texture offers wonderful cues for dessert versions too.
Tools That Make Assembly Effortless
Every great board needs the right tools. My go-to for arranging small fruits and chocolate shards is the TOWINGO 9-Inch Silicone Kitchen Tongs (available here); they’re gentle on delicate items and make it easy to adjust without smudging the design. For slicing bread, biscotti, or chocolate bark cleanly, I rely on the Mercer Culinary Millennia 10-Inch Bread Knife (buy it here). Both tools are sturdy, reliable, and make prep almost effortless.
A Note on Texture
When everything looks and tastes perfect, texture is what keeps people coming back for more. Combine crisp pretzels, creamy dips, soft berries, and a touch of crunch from nuts or granola clusters. Think of your board like a melody — highs and lows, smooth and sharp, rich and refreshing.
You can create your own flavor story each time: go classic with chocolate and berries, or try something adventurous like pairing chocolate-dipped bacon strips with candied nuts for a crowd-pleaser twist. And if you love savory-sweet combos, you’ll adore the pumpkin-shaped cheese ball with pecans and sage — it pairs beautifully with your dessert board for fall gatherings.

Step-by-Step Assembly & Presentation Tips
Now that you’ve selected your fruits, chocolates, and savory bites, it’s time for the fun part — bringing it all together. This is where your Sweet and Savory DIY Dessert Charcuterie Board transforms from a collection of snacks into a stunning centerpiece. The secret lies in layering textures, balancing colors, and creating a sense of abundance.
Step 1: Set Your Base
Choose a large wooden or marble board as your canvas. The round shape is classic, but rectangular boards work beautifully for buffet-style displays. Begin by placing small bowls or ramekins in different areas of the board — one for melted chocolate, one for nuts, and another for dried fruit or mini candies. These anchor points give visual structure and help guide the eye.
If you’re hosting during the holidays, use small decorative ramekins or festive elements inspired by these Christmas tree cheese board ideas. They add instant warmth and color, turning your dessert board into a seasonal showstopper.
Step 2: Layer the Chocolate
Start with your richest element — the chocolate. Arrange dark and milk chocolate squares in clusters, then tuck chocolate bark or brownie bites between the bowls. Keep the pieces varied in shape and size to make the layout look natural and abundant. If you’re melting chocolate for dipping, whisk it gently using the NileHome Stainless Steel Whisk Set (see it here) for a smooth, glossy texture.
For even more variety, add inspiration from our cranberry fig charcuterie board ideas. The contrast of tart fruits with rich chocolate creates that perfect sweet-savory harmony.
Step 3: Add the Savory Crunch
Next, place your savory elements. Think pretzels, nuts, or even thin slices of crusty bread. Arrange them near the chocolate for that irresistible salty-sweet pairing. Use your TOWINGO 9-Inch Silicone Kitchen Tongs (get them here) to position everything cleanly without breaking delicate pieces.
If you love mixing savory flavors, take cues from this all-meat board with pickles and mustard trio. It shows how color contrast — like golden pretzels against deep chocolate — creates visual balance.
Step 4: Fill in the Freshness
This is where your fruits shine. Nestle strawberries, raspberries, and blackberries in open spaces, allowing their natural colors to pop. The bright red and deep purple tones bring life to the darker elements. Don’t be afraid to overlap layers slightly; it makes the board feel abundant and inviting.
To elevate the flavor, lightly brush strawberries with honey using your Lightyear Silicone Basting & Pastry Brush Set (buy it here). It enhances their shine and sweetness, making them irresistible under soft lighting.
Step 5: Garnish with Flair
Finish with a few beautiful touches — mint leaves for freshness, sea salt flakes on chocolate, or even a light dusting of cocoa powder. If you want to make your display extra festive, add small heart-shaped candies or cookies as shown in the pink-themed image above. For Valentine’s Day or special celebrations, you can even create a “romantic” variation inspired by our 10 stunning candy cane charcuterie board ideas.
Presentation Tips
- Play with height: Stack cookies or chocolate pieces for dimension.
- Mix materials: Use wood, glass, and ceramic elements to add texture.
- Lighting matters: Soft, natural light enhances the rich tones of chocolate and berries.
- Balance: Always keep equal parts sweet and savory to appeal to every guest.
And most importantly — don’t stress about perfection. Every board is meant to look unique and spontaneous. A few imperfectly placed berries or uneven chocolate pieces actually make it look more inviting and natural. For another beautiful idea, explore our stunning cornucopia cheese board ideas — they’re a great visual reference for organic, overflowing presentation.
Nutrition & Benefits
Dessert boards are often seen as pure indulgence, but with the right ingredients, your Sweet and Savory DIY Dessert Charcuterie Board can be a wholesome, balanced treat. It’s all about mindful selection — mixing natural sweetness from fruit, good fats from nuts, and antioxidant-rich dark chocolate. This balance not only satisfies cravings but also supports a healthy, active lifestyle without guilt or restriction.
The Power of Balance
Unlike traditional desserts loaded with processed sugars, a dessert board like this celebrates variety. Each element plays a nutritional role — the fruits bring vitamins and hydration, the nuts and pretzels add protein and fiber, and dark chocolate offers antioxidants and mood-boosting compounds. When combined, these foods deliver both energy and satisfaction.
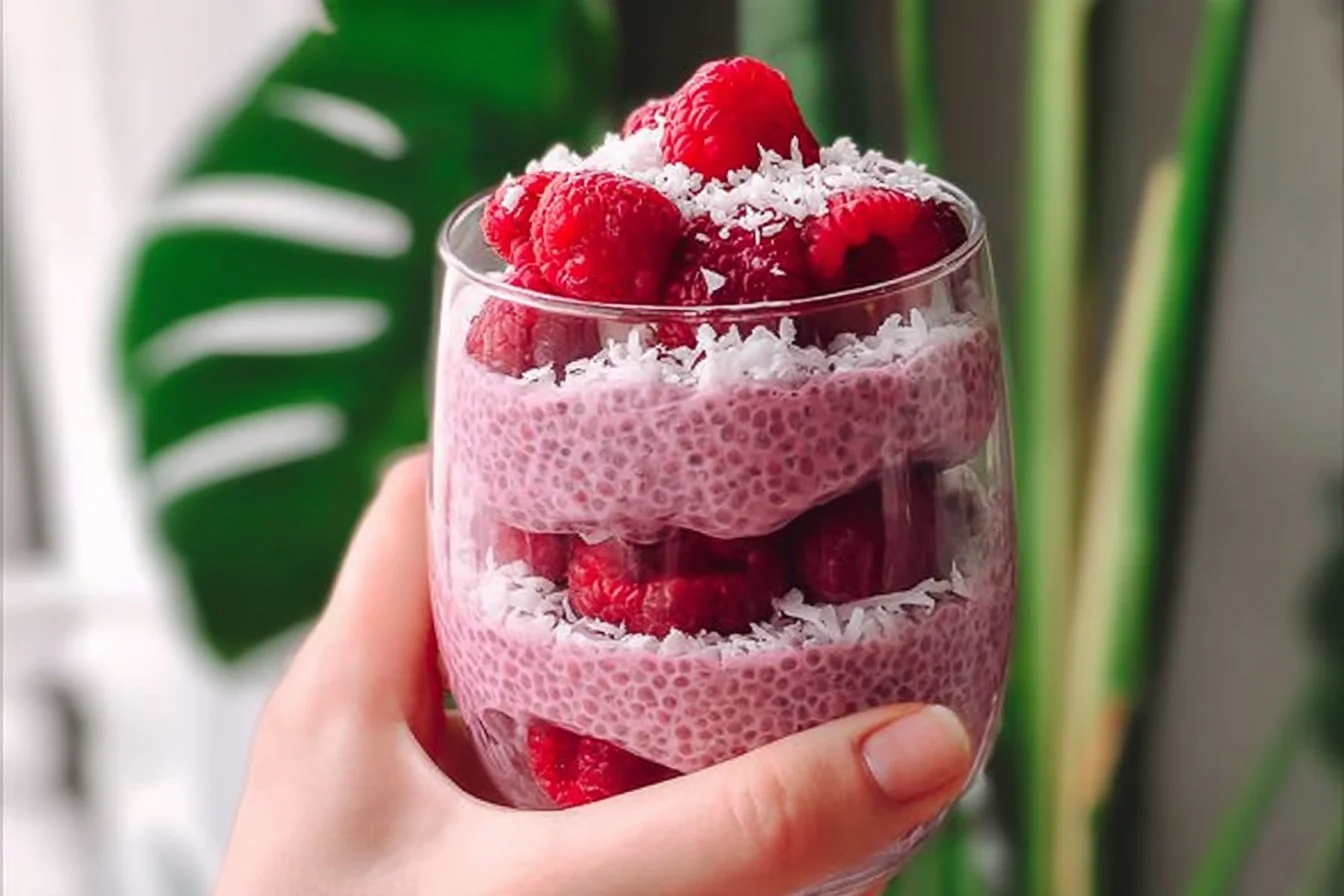
If you love balanced recipes like this one, you’ll also enjoy the 5-minute detox green smoothie bowl. It’s a refreshing way to reset after a night of snacking and pairs beautifully with a lighter dessert spread the next day.
Macro Breakdown (Per Serving Estimate)
| Nutrient | Amount | Benefit |
|---|---|---|
| Calories | ~210 kcal | Moderate portion for a light dessert |
| Protein | 6g | From nuts, pretzels, and dairy dips |
| Carbohydrates | 28g | Natural sugars from fruit + dark chocolate |
| Fat | 9g | Healthy fats from nuts and dark chocolate |
(Values are estimated and depend on serving sizes and specific ingredients used.)
Ingredient Highlights
Dark Chocolate – A natural source of magnesium and flavonoids, which may help improve blood flow and reduce inflammation. Choose at least 70% cocoa for the best health benefits.
Berries – Packed with vitamin C and antioxidants. Raspberries and blackberries also offer fiber, which helps regulate blood sugar levels even when paired with sweet elements.
Nuts & Pretzels – Almonds, pistachios, or cashews contribute protein and crunch, making each bite more satisfying. For an extra nutritional boost, use whole-grain or low-sodium pretzels.
Cheese (optional) – If you’re leaning toward a sweet-salty balance, a few cubes of brie or goat cheese offer protein and creaminess that contrast beautifully with fruit.
For another flavor-packed, nutrient-conscious dish, check out our 5-step high-protein pumpkin pancakes recipe — a breakfast favorite that aligns perfectly with this “sweet but balanced” philosophy.
Healthy Indulgence, Made Simple
Dessert charcuterie doesn’t have to derail your wellness goals. Instead, it fits naturally into an intuitive eating approach: small portions of a variety of foods that make you feel good. This is how I like to think about healthy living — balance, not deprivation. You can even repurpose leftover ingredients the next day for a mini snack board, as shown in the 5-minute kids-friendly mini snack board.
And if you’re tracking your portions, a tool like the Escali Primo Digital Food Scale (shop it here) is incredibly helpful. It’s precise, simple to clean, and keeps you mindful about serving sizes without taking away the joy of eating.
Pro Tip: Healthy Sweet Dip
Instead of heavy cream or caramel sauce, make a simple Greek yogurt dip with honey and cocoa powder. It’s creamy, lightly sweetened, and adds a boost of protein. Use your NileHome Stainless Steel Whisk Set (available here) to mix it to a perfectly smooth texture.
Health Disclaimer: Always consult a healthcare professional for personalized nutrition advice, especially if you have dietary restrictions or specific health conditions.
For even more balanced party ideas, you might love our budget-friendly snack board with dips — it’s proof that nutritious and delicious can go hand in hand, whether you’re feeding family or friends.
Serving Ideas, Storage Tips & FAQs
Your Sweet and Savory DIY Dessert Charcuterie Board deserves a memorable presentation — one that encourages guests to gather, taste, and talk. Whether it’s a cozy night in or a festive celebration, how you serve your board makes all the difference.
Creative Serving Ideas
1. The Movie Night Platter
For a laid-back evening, pair your dessert board with sparkling water, herbal tea, or a fun themed drink like this Ghostly White Russian Halloween cocktail recipe. Add popcorn clusters and chocolate bark for a sweet-and-salty bite between films.
2. The Romantic Board for Two
Use a smaller platter, focusing on heart-shaped cookies, chocolate truffles, and strawberries brushed with honey using the Lightyear Silicone Basting & Pastry Brush Set (available here). For an elegant touch, drizzle melted chocolate or white icing with the NileHome Stainless Steel Whisk Set (get it here).
3. The Celebration Spread
Hosting a birthday or baby shower? Build a board around a color theme — pink candies, macarons, and dipped pretzels like in the photo above. Include lighter, refreshing bites from our 5-step street corn chicken rice bowl to balance the sweetness.
4. The Holiday Feast Finale
After a big meal — say, after serving the 5-star sausage stuffing casserole or 5-star southern green bean casserole — a dessert board like this feels lighter and communal. Add festive garnishes such as sugared cranberries or mini gingerbread cookies to tie it into your holiday table.
Storage Tips
- Short-Term Storage: Cover the assembled board with plastic wrap and refrigerate for up to 4 hours before serving. Add pretzels and crackers at the last minute to keep them crisp.
- Leftovers: Separate fruit from dry items before refrigerating. Store fruit in airtight containers and chocolate in a cool, dry place.
- Make-Ahead Option: Prepare all ingredients ahead of time and store them individually. Assemble the board 30 minutes before guests arrive.
If you’re planning to serve your board alongside savory options, take inspiration from the classic DIY meat and cheese charcuterie board or 5-simple cheese board for four. Together, they create a complete and visually striking grazing table.
FAQs
1. How far in advance can I prepare a dessert charcuterie board?
You can prep it up to 4 hours before serving. Keep fruits and dips refrigerated, then assemble just before guests arrive to maintain freshness and texture.
2. What are the best chocolates for a sweet and savory board?
Use a mix of dark (70% cocoa or higher), milk, and white chocolate for visual and flavor variety. Bars, truffles, or even chocolate-covered nuts work beautifully.
3. How do I prevent fruits from making other ingredients soggy?
Keep juicy fruits like strawberries and raspberries in small bowls or line sections with parchment paper to separate them from dry items like pretzels and nuts.
4. What savory items work best with dessert charcuterie?
Pretzels, salted nuts, mini cheese wedges, and lightly seasoned popcorn add crunch and balance. Try pairing them with fruits or chocolate for contrast.
5. Can I make a healthier version of this board?
Absolutely. Swap candies for dried fruit, use dark chocolate, and add Greek yogurt dips or low-sugar nut butter for a nourishing twist. You can find more health-forward ideas in our vegetarian charcuterie board with roasted veggies.
Recommended Products
- Lightyear Silicone Basting & Pastry Brush Set (2-Pack) – Buy here: Heat-resistant and perfect for glazing fruit or brushing melted chocolate.
- TOWINGO 9-Inch Silicone Kitchen Tongs (Set of 3) – Shop here: Great for arranging delicate fruits and candies without smudging.
- Escali Primo Digital Food Scale – View here: Compact, precise, and ideal for portioning ingredients.
- Mercer Culinary Millennia 10-Inch Bread Knife – Get it here: For clean slicing of chocolate bark or baked goods.
- NileHome Stainless Steel Whisk Set (3-Pack) – Available here: Perfect for whipping cream, yogurt dips, or drizzling chocolate.
Sophie’s Closing Note
A dessert charcuterie board isn’t just food — it’s a celebration of texture, flavor, and color. It brings people together and reminds us that healthy eating can still be joyful, creative, and full of sweetness. So the next time you crave dessert, think beyond the oven — grab your board, a few simple ingredients, and make it yours.